
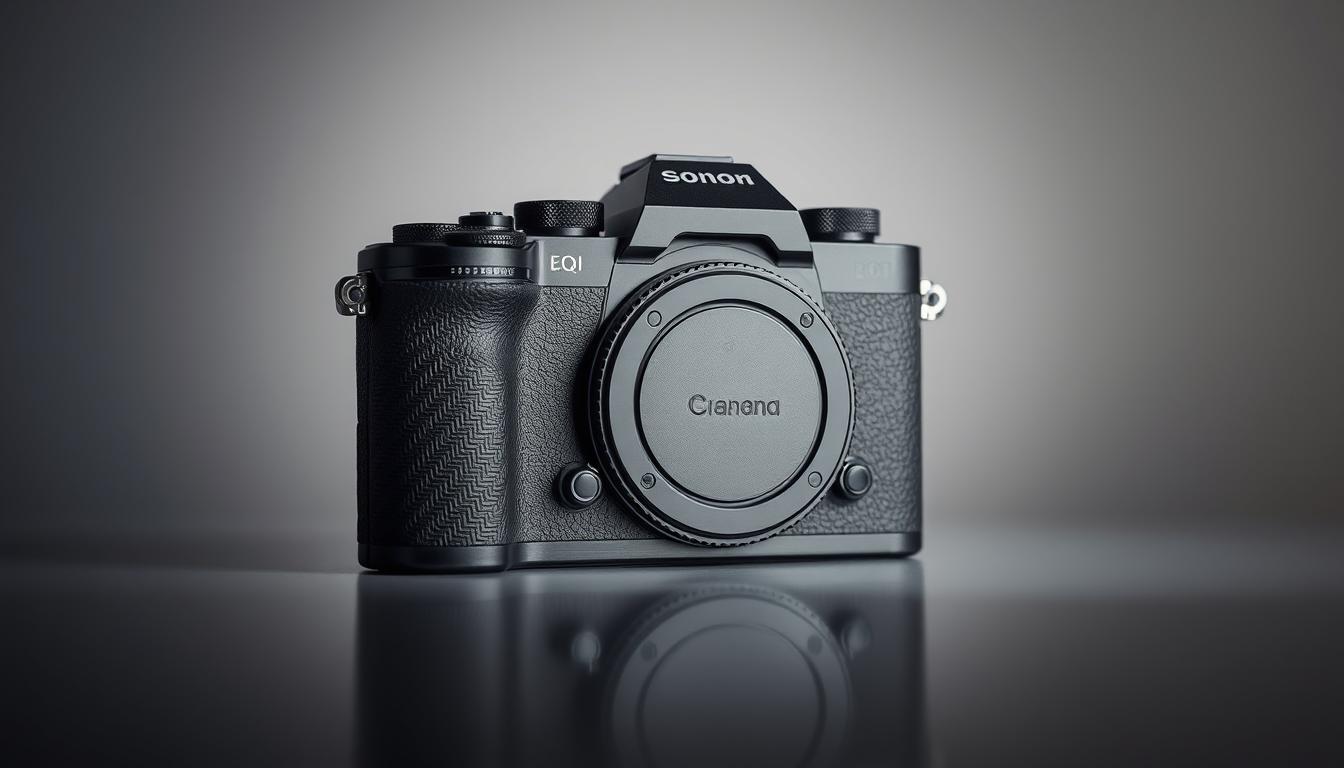
Perfect Camera Body Product Photography Solutions in 2025
As an e-commerce store owner, I know how crucial great product visuals are. They must grab your customers’ attention and boost sales. In today’s world, where online shopping is common, top-notch product photos are essential, not just a luxury.
This guide will help you create stunning camera body product images. It will improve your company’s situation. We’ll cover everything from choosing the right camera and lighting to advanced composition and post-processing.
Let’s start and discover how perfect camera body product photography can elevate your e-commerce success.
Table of Contents
Key Takeaways
- Understand the importance of high-quality product visuals for e-commerce success
- Discover the essential equipment and tools needed for professional-grade camera body product photography
- Learn how to set up an efficient and optimized photography studio space
- Master the art of lighting techniques for capturing stunning product images
- Explore the technical considerations and camera settings for optimal results
- Dive into advanced composition guidelines for captivating product presentations
- Streamline your post-processing workflows for a polished, professional look
Understanding the Fundamentals of camera body product photography
In the world of e-commerce, visual content is key to grabbing attention and boosting sales. High-quality product images are crucial for showing off your products, building trust, and guiding purchase decisions. Learning the basics of camera body product photography is the first step to excelling in this important part of your e-commerce strategy.
The Role of Visual Content in E-commerce
Research shows that product images are the most critical part of online shopping. They directly affect how customers behave. Good product photos can increase interest, improve sales, and lower returns. Investing in top-notch camera body product photography is a smart move for your e-commerce success.
Impact on Consumer Purchase Decisions
Today’s shoppers are very visual and rely on images to decide what to buy. Clear, high-quality images that show your products accurately can build trust and confidence. On the other hand, bad product photos can make customers doubt and leave without buying.
Key Elements of Professional Product Images
- Proper Lighting: Good lighting makes the product look better, adds depth, and shows true colors.
- Sharp Focus: A sharp image is key to showing off product details and quality.
- Multiple Angles: Showing the product from different sides and close-ups helps customers understand it better.
- Consistent Branding: Keeping a consistent look in all your product images strengthens your brand and makes shopping smoother.
By focusing on these key elements of professional camera body product photography, you can improve your e-commerce site, attract your audience, and increase sales.
“Investing in high-quality camera body product photography is a proven strategy for driving e-commerce success. It’s not just about taking pictures – it’s about creating a visual experience that engages and inspires your customers.”
Essential Equipment for Camera Body product photography
To take amazing product photos for your camera body e-commerce site, you need the right gear. Start with a top-notch DSLR or mirrorless camera. Think about the Sony a6400, Canon T7i, or Nikon D850. These cameras give you great pictures, smart autofocus, and control over your shots.
Next, get a variety of lenses. Prime lenses between 50-100mm are perfect for product shots. They give you the right view and depth. A zoom lens, like the Canon 24-105mm, is also handy for different shots.
- DSLR or mirrorless camera (e.g., Sony a6400, Canon T7i, Nikon D850)
- Prime lenses (50-100mm focal length)
- Zoom lens (e.g., Canon 24-105mm)
Good lighting makes your product photos pop. Get softboxes, umbrella lights, or a ring light for soft, even light. Use reflectors to add light and balance shadows for a pro look.
| Lighting Equipment | Benefits |
|---|---|
| Softboxes | Provide soft, even lighting |
| Umbrella Lights | Versatile and easy to set up |
| Ring Lights | Create a flattering, shadowless effect |
A solid tripod keeps your camera and light steady. Choose one with a geared head for easy adjustments. Also, get a backdrop system, like a collapsible paper or fabric, for clean, pro-looking shots.
With this basic camera equipment, DSLR, lenses, lighting gear, and photography accessories, you’re ready to take stunning product photos for your e-commerce site.
Setting Up Your Photography Studio Space
Creating a well-organized home photography studio is key for amazing product images. The right setup boosts your workflow and photo quality. Let’s look at the main steps to set up your studio.
Choosing the Right Location
Your studio should be in a room with lots of natural light. Place your main table at a 90-degree angle to a big window. This setup helps control light and gives a clean backdrop for your shots.
Studio Layout Optimization
Design your studio for ease and flexibility. Use a white background for a simple look. Place your camera and lights where you can easily reach them for smooth shoots.
Workspace Organization Tips
- Get a sturdy, adjustable table (24-27 inches wide) for your main area.
- Use your chosen background material on the table for a unified look.
- Store props, accessories, and tools in boxes or shelves for quick access.
- Keep cameras, lenses, and lights within reach to avoid delays.
- Keep your space clean and organized to improve your photography flow.
By thinking about your studio’s location, layout, and organization, you can make a great workspace. This will help you take amazing photos of camera bodies.
Mastering Lighting Techniques
In Recommended Settings for camera body product photography, lighting is key. Use natural light when you can, setting up near big windows. This gives a soft, diffused glow. For more control, try softboxes or diffusers for even light that shows off your product’s best sides.
Play with light source distance and angles to reduce harsh shadows. Use reflectors to bounce light and fill shadows, making your image balanced and eye-catching.
| Lighting Technique | Benefits |
|---|---|
| Natural Light | Soft, diffused glow, creating a natural and inviting atmosphere |
| Softboxes | Controlled and diffused lighting, minimizing harsh reflections and highlighting product details |
| Diffusers | Softening and spreading out harsh light, while accentuating highlights |
| Reflectors | Manipulating and bouncing light to fill in shadows and add brightness |
Mastering lighting techniques helps you take stunning product photos. These images grab your audience’s attention and boost sales. The secret to great product lighting is to keep trying, learning, and improving until you get the look you want.

“The cornerstone of excellent product photography is appropriate lighting.With the correct methods, you may improve your photos and give your clients an eye-catching experience. – Professional Photographer John Gress
Camera Settings and Technical Considerations
To take amazing product photos, you need to know your camera well and set it right. Aperture, shutter speed, and ISO are key. They assist in creating images that capture the interest of your viewers.
Optimal Aperture Settings
The aperture controls how much light gets in and affects the depth of field. For product shots, use a small aperture (high f-number) to focus everything clearly. Apertures between f/8 and f/16 work best for sharp, detailed images.
Shutter Speed Selection
The length of time the camera’s sensor is exposed to light is known as the shutter speed. For still products, a slower shutter (like 1/60 second) lets in more light. But, for moving products, a quicker shutter (over 1/125 second) stops motion and avoids blur.
ISO Management
ISO regulates the sensor’s light sensitivity.Keep the ISO low for product photographs to prevent noise and maintain great quality. Start with ISO 100 or 200. Only go higher if you must for less light.
Learning these camera settings helps you take top-notch product photos. Your images will show off your products beautifully.
| Camera Setting | Typical Range | Recommended Settings for camera body product photography |
|---|---|---|
| Aperture | f/1.8 to f/16 | f/8 to f/16 for greater depth of field |
| Shutter Speed | 30 seconds to 1/4000th of a second | 1/60 second or longer for stationary products, 1/125 second or higher for moving products |
| ISO | 100 to 6400 | ISO 100 or 200, increase only when necessary for low-light conditions |
Background Selection and Setup
The background is key in camera body product photography. Choose a clean, white background for a professional look. This makes your product the main focus. Avoid patterns that might distract from your product isolation.
Seamless paper rolls, cloth, or poster board work well as backdrops. Make sure the background blends smoothly from vertical to horizontal. This creates a seamless look, keeping your product clean and clear.
Neutral colors like white, black, or light pastels are great choices. They complement your product and make it pop. These colors offer a clean background that highlights your product’s details and colors.

Choosing the right background can greatly improve your product photos. A clean, seamless backdrop showcases your product well. It can also boost consumer interest and sales.
Camera Body Product Photography Composition Guidelines
When taking photos of your camera body products, how you compose them is key. Good composition makes your images stand out and grab your audience’s attention. It shows off your products’ best features and encourages people to buy.
Angle Selection
Try different angles to show your camera body products in the best way. Use the rule of thirds for balanced shots. Take photos from above, at eye level, and at angles to show all sides of your products.
Product Positioning
Place your camera body products to highlight their best features. Think about their shape, size, and special qualities when setting them up. Try different ways like vertical, horizontal, or diagonal to add interest.
Detail Emphasis
Make sure to include close-up shots to show off your products’ details and textures. These shots can show off the craftsmanship and materials of your camera bodies. They help build trust with potential buyers.
By following these guidelines, you can make images that show off your products’ quality and features. The goal is to give a complete and engaging visual experience. This will inspire and convince your audience to buy.
Post-Processing Workflows
In the world of Recommended Settings for camera body product photography, post-processing is crucial. It can make your images look professional. Adjusting exposure, contrast, and color can create the perfect atmosphere for your product photos.
Being consistent in post-processing helps you create a unique style. This is important for branding and commercial work. Techniques like local adjustments and color grading can greatly improve your photos.
At Kelly Tareski Photography, we’ve honed our photo editing, image retouching, and color correction skills. We focus on perfect exposure, contrast, and color balance in our work.
Post-processing is more than fixing mistakes. It’s about turning a good photo into an amazing one. The right techniques can fix exposure, color balance, and sharpness issues.
Streamlining Your Workflow
To make your post-processing workflow smoother, use high-quality presets. These presets can help you achieve better results and make adjustments more subtle. They save time and ensure consistency in your product catalog.
For landscape photos, sharpening and adjusting clarity can enhance details. Using Lightroom presets for batch editing can also speed up your work. This keeps your product images looking consistent.
“Post-processing is essential for transforming a good photo into an exceptional one. With the right techniques, you can bring out the best in your product images.”
Mastering post-processing can take your product photography to the next level. It helps you create stunning images that grab attention and boost sales. The key is to balance efficiency with creativity, making sure each image shows your brand’s unique style.

Common Challenges and Solutions
As a professional photographer, you might face many challenges in camera body product photography. These can affect your image quality. Let us examine a few prevalent issues and resolve them.
Reflections on Glossy Surfaces
Photographing shiny or reflective products can be hard. Unwanted reflections can mess up your images. To avoid this, use a polarizing filter on your lens. Also, changing the lighting angles can help reduce reflections.
Uneven Lighting
Even lighting is key for great product shots. Use diffusers and reflectors to balance the light. This reduces hot spots and shadows. For optimal results, experiment with various lighting configurations and angles.
Color Accuracy Challenges
It’s important to show the true color of your products. Use color calibration tools like gray cards or color targets. This ensures your images match the real product colors.
Getting perfect product photos takes time and effort. Be ready to try different things and improve your skills. With dedication and focus, you can solve these problems and create stunning camera body product images.
| Challenge | Solution |
|---|---|
| Reflections on Glossy Surfaces | Use a polarizing filter on your lens and adjust lighting angles |
| Uneven Lighting | Employ diffusers and reflectors to balance the lighting |
| Color Accuracy | Utilize color calibration tools, such as gray cards or color targets |
Conclusion
Mastering camera body product photography is key for e-commerce success. Invest in quality gear, set up your studio well, and improve your skills. This way, you can make images that grab your online shoppers’ attention.
Stick to the best practices in lighting, composition, and editing. This will help you show off your products well and increase sales online. Remember, 51% of Americans like to shop online, and your images are crucial in their decision-making.
Follow the product photography best practices and use the power of e-commerce success to grow your brand. This will help you build trust with customers and boost your online sales. Use the tips from this guide to enhance your camera body product photography.
FAQ
What equipment do I need for camera body product photography?
You’ll need a good DSLR or mirrorless camera like the Sony a6400 or Canon T7i. Also, lenses with a 50-100mm focal length are best. For lighting, softboxes, umbrella lights, and ring lights are key. Don’t forget reflectors, tripods, and backdrops.
Smartphones like the iPhone 11 Pro or Google Pixel 4 can also work well on a budget.
How do I set up my photography studio space?
Place your studio near a big window for natural light. Your table should be 90 degrees from the window. Use a white sweep for a clean background.
Make sure your equipment and props are easily accessible by organizing your area. A folding table (24-27 inches wide) is great for flexibility.
What lighting techniques should I use for Recommended Settings for camera body product photography?
Use natural light when you can, placing your setup near large windows. For better control, softboxes or diffusers create even lighting. Play with light distance and angles to avoid harsh shadows.
To fill in shadows and bounce light, use reflectors.
How can I change my camera’s settings to get the best results?
For a greater depth of field, use a tiny aperture (high f-number). Choose the right shutter speed to avoid blur. Keep ISO low to reduce noise, increasing it only when needed in dark places.
What background should I use for my product photos?
Pick a clean, simple background to highlight your product. White is a top choice for e-commerce. Use seamless paper, cloth, or poster board for a smooth look.
How should I compose my product photos?
Follow the rule of thirds for balanced shots. Take photos from different angles to show all product features. Include close-ups to highlight textures and details.
Position the product to focus on its key features and selling points.
What post-processing steps should I take to enhance my product images?
Create a consistent editing workflow to adjust exposure, contrast, and white balance. Remove blemishes and crop images as needed. Consider making presets to speed up your editing.
How can I address common challenges in Recommended Settings for camera body product photography?
Use polarizing filters or adjust lighting to reduce reflections on shiny surfaces. Employ diffusers and reflectors for even lighting. Use color calibration tools for accurate colors.
Be ready to try different things and make adjustments until you get the look you want.